

How to Plan a Commercial Dishwashing Area for an Efficient Kitchen Workflow
Plan a commercial dishwashing area around dirty return, sorting, pre-rinse, inlet-side handling, machine direction, clean-side exit and rack movement.
SourcePro Editorial Team
A commercial dishwashing area is not simply a place to install a dishwasher. It is a working sequence that receives used items, separates and prepares them for washing, moves them through the machine, and returns clean items to service or storage. When those stages are not coordinated, a suitable machine can still create congestion, unnecessary handling or overlap between dirty and clean items.
A practical plan begins with the workflow rather than an isolated equipment footprint. The arrangement should consider how plates, bowls, cups, trays, utensils and racks enter the area; where staff remove waste and pre-rinse items; how racks reach the machine; and where clean items can drain, wait and leave the area. The final arrangement depends on the selected machine, its direction, available space, utilities and project conditions.
1. Start With a Dirty-to-Clean Workflow
The basic planning sequence should move in one clear direction: dirty return, sorting and scraping, pre-rinse or sink handling, dishwasher inlet, washing, clean-side exit, draining or temporary holding, then clean storage or redistribution. This is an illustrative planning sequence, not a universal layout. Some projects have restricted existing space, multiple service points or different item flows.
The principle remains useful: dirty items should enter from one side of the process, while clean items should leave from the other side without unnecessary crossing. Start by asking where used tableware returns from. The return route should not block food preparation, service circulation or access to other back-of-house equipment. The final arrangement remains subject to project confirmation.
2. Define the Main Dishwashing Zones
The zones do not need to be large formal rooms. In a compact kitchen, several functions may sit along one controlled line. The key is to identify each activity before finalising equipment positions.
3. Plan the Dirty Return and Sorting Area
The dirty return is the point where used items first enter the washing process. It should give staff enough room to receive items, remove waste, separate trays or utensils, and place items into suitable racks or temporary positions. Consider whether dishes arrive in batches after meal periods or continuously from a service area.
A busy return route can become blocked if there is no place to hold a loaded rack, tray stack or trolley while staff are sorting items. The collection point should also avoid conflict with restaurant staff, delivery routes or food-preparation traffic. Floor and drainage conditions should be reviewed as part of the wet-area plan, based on actual site conditions and the selected equipment.
Where several dining or service areas return items to the same point, note the expected arrival pattern before fixing the sorting position. A shared return point may need a controlled handover sequence so that one service period does not prevent another team from clearing used items safely.
4. Position the Pre-Rinse Sink and Inlet Table
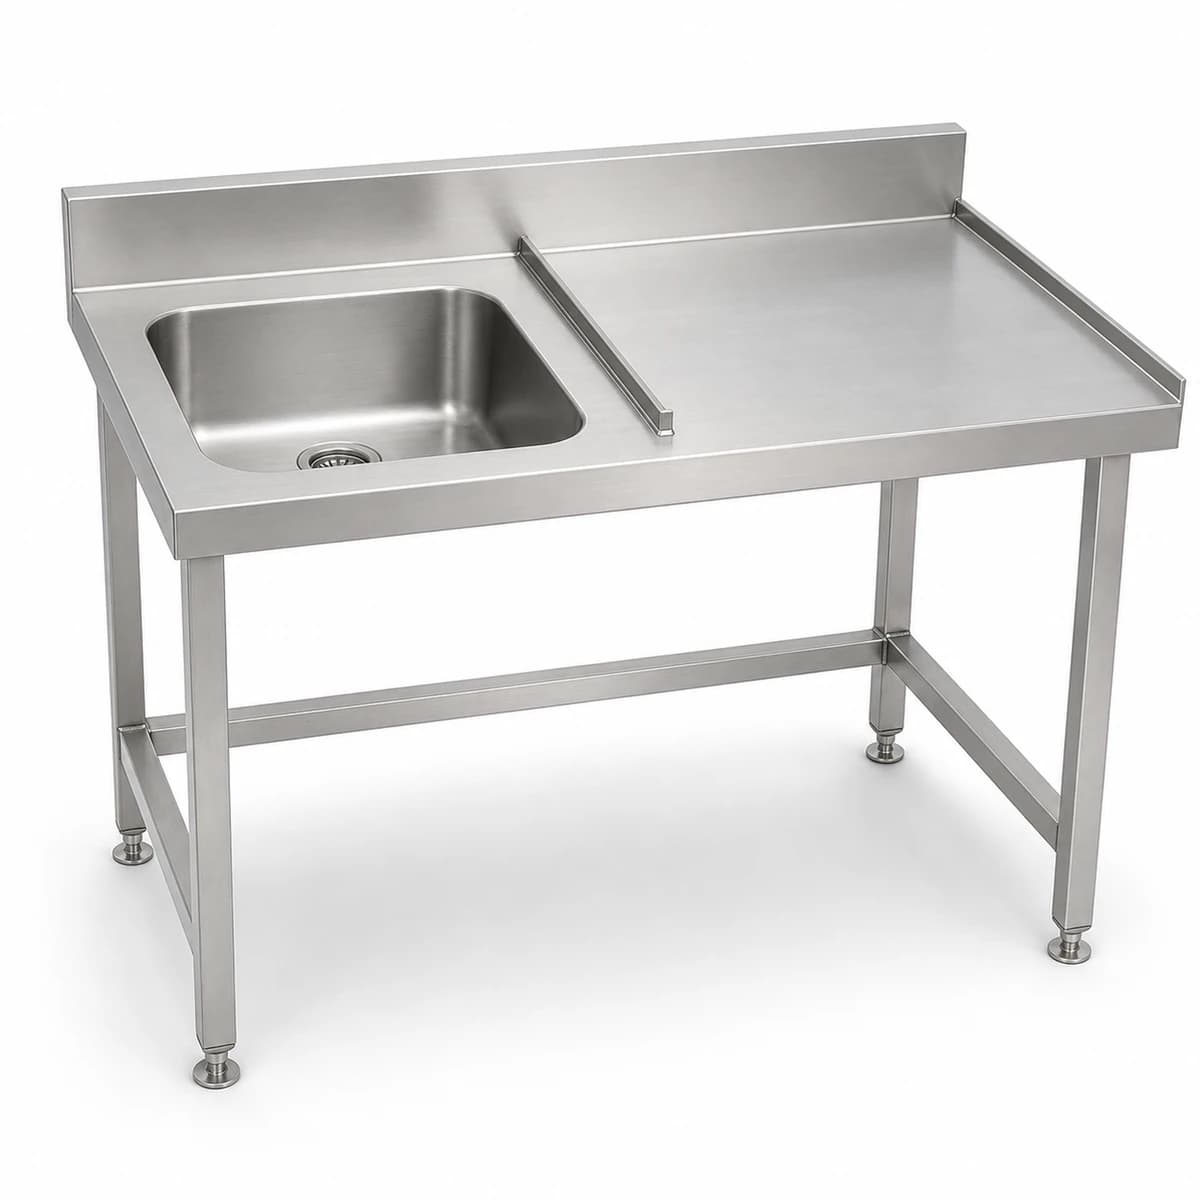
The pre-rinse and inlet-side area connects dirty-item handling with the dishwasher. A stainless steel sink unit can support pre-rinse and other wet-area handling tasks where its confirmed configuration suits the project. Its bowl position, drainboard arrangement, working height and available clearance should be considered alongside the selected machine and surrounding workflow.
A commercial dishwasher inlet table can provide a working surface between pre-rinse handling and a rack-based machine. Confirm the machine-side connection, table edge, rack guidance, working height and loading direction before approving the layout. Table and machine compatibility depends on the selected configuration and is subject to project confirmation.
5. Confirm Dishwasher Direction Before Finalizing the Layout
Machine direction affects the entire working sequence. Before finalising the arrangement, confirm whether loading and unloading will operate left-to-right or right-to-left. The direction may be influenced by room shape, utility locations, staff position, machine door or hood operation, adjacent equipment and the intended clean-side exit.
This article focuses on the layout effect of machine direction. For selecting a dishwasher type, reviewing rack demand and comparing purchase requirements, see the commercial dishwasher buying guide.
6. Plan the Clean-Side Exit and Draining Area
The clean side should allow washed items to leave the machine, drain or air dry as required by the project's operating procedures, and wait briefly before returning to service or storage. Avoid planning the clean-side exit as an afterthought. If there is no practical holding position, clean racks can accumulate at the machine exit or be carried back through the dirty route.
Review the expected mix of plates, bowls, cups, trays and utensils. Different items may require different handling or temporary holding methods. The plan should allow staff to remove clean racks without blocking the machine, the inlet side or nearby circulation routes. No fixed drying performance or processing capacity should be assumed from a general layout guide.
7. Allow Space for Staff, Racks and Trolleys
A workable area needs more than equipment footprints. Staff need space to stand, turn, load racks, remove clean items, access controls and carry items safely. Racks may need a short waiting position before loading or after unloading. Trolleys may also support internal movement where clean items, racks or supplies travel between the washing area and another operating zone.
Where this movement is part of the project, a stainless steel utility trolley may be relevant for internal handling. Its use should be considered with aisle width, turning needs, floor conditions and the actual item load. Keep staff movement separate from food-preparation traffic where practical, and allow for machine operation, service-panel access and routine cleaning.
8. Coordinate Water, Drainage, Electrical and Ventilation
Utilities should be reviewed early because their locations influence equipment orientation and access. At the layout stage, identify the likely water connection location, drainage point, electrical connection, ventilation or steam conditions, floor conditions and required access for service.
Do not use a generic washing-area plan to determine fixed pressure, temperature, voltage, drain size or connected-load values. These requirements depend on the selected machine and should be checked against the supplier's technical sheet, local professional review and destination-market conditions.
9. Avoid Common Dishwashing Area Planning Mistakes
- Allowing dirty and clean item routes to cross without a controlled sequence.
- Providing too little space for sorting, scraping or temporary dirty-rack handling.
- Confirming machine direction after inlet-side equipment has been positioned.
- Assuming an inlet table will fit a selected machine without checking the interface.
- Omitting a waiting position for racks, trolleys or clean items.
- Blocking service panels, access routes or routine cleaning areas.
- Locating utilities before the selected machine is confirmed.
- Returning clean items through the main dirty-item route.
Most of these issues are easier to address during planning than after equipment has arrived on site.
10. Information to Prepare Before Requesting a Layout Review
- Operation type and peak meal period.
- Expected dish, tray, glass and utensil mix.
- Selected or preferred dishwasher, if one has been identified.
- Required machine direction.
- Available room dimensions and access routes.
- Water, drainage and electrical connection locations.
- Door, aisle and service-access information.
- Required sinks, inlet-side equipment, clean-side equipment or trolleys.
- Destination country, site photographs, and layout or utility drawings where available.
Restaurant projects can be reviewed within the wider restaurant kitchen solution. Hotel project teams may coordinate restaurant, banqueting and related operational needs through the hotel kitchen solution.
11. Final Dishwashing Workflow Checklist
Conclusion
Plan the workflow before finalising equipment positions. A clear dirty-to-clean sequence helps coordinate the return point, sorting, pre-rinse, sink unit, dishwasher inlet table, machine direction and clean-side handling. The final arrangement should be checked against the selected machine, actual site conditions, utilities and project requirements.
Discuss Your Dishwashing Workflow
Share the operation type, peak service period, expected item mix, available dimensions, preferred machine direction, utility locations and any drawings or site photographs. SourcePro can use this information to support a project-based workflow and equipment coordination discussion.
Related Products
Product Pages Mentioned in This Topic
Stainless Steel Equipment
Stainless Steel Dishwasher Inlet Table
A made-to-order stainless steel inlet table for commercial dishwashing workflows, combining a left-side pre-rinse sink, right-side rack landing area and project-specific dishwasher connection.
View Details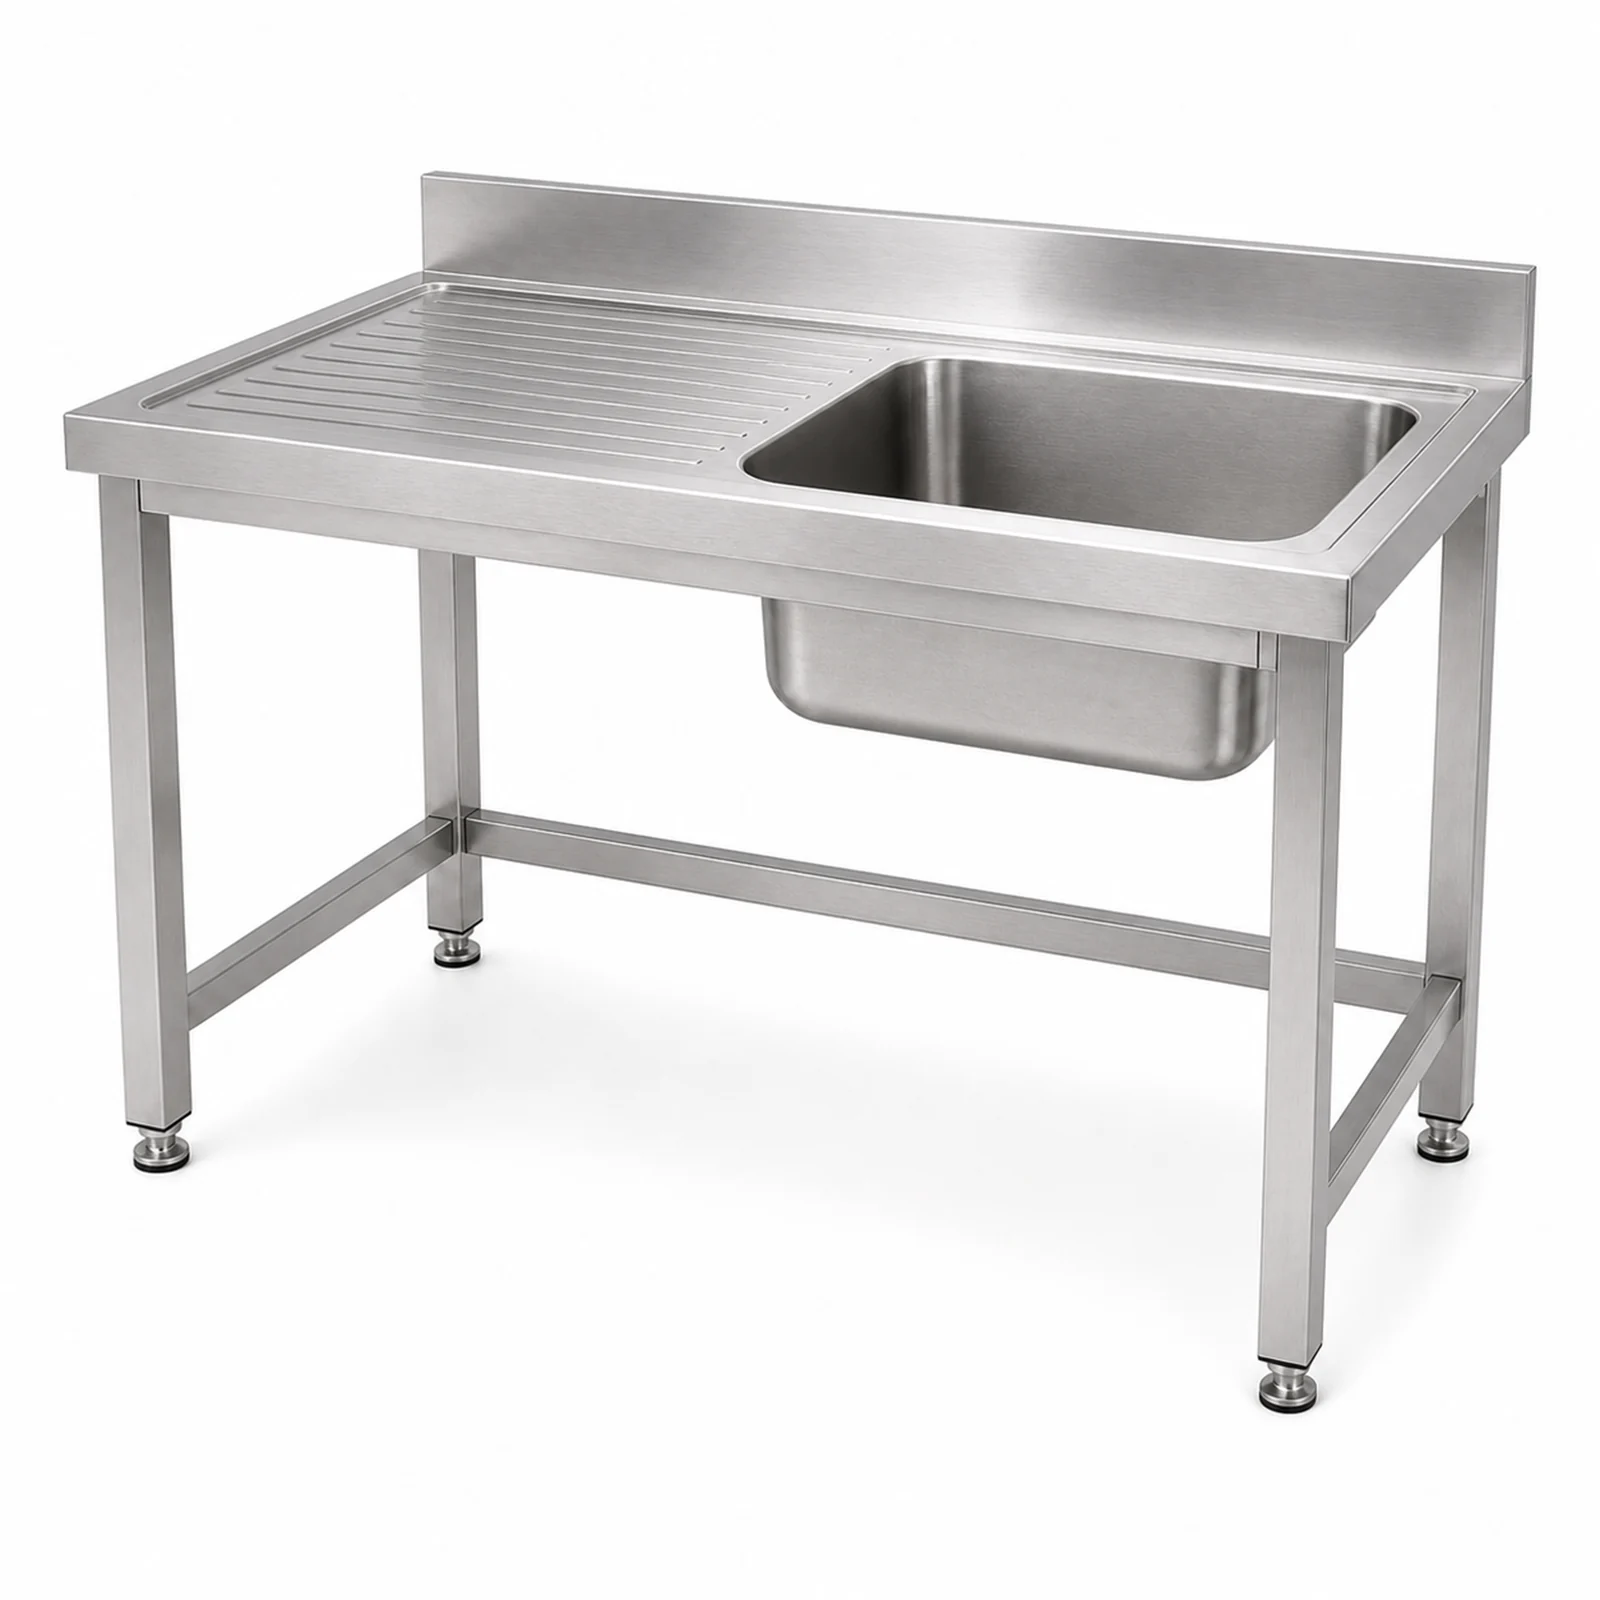
Stainless Steel Equipment
Stainless Steel Sink Unit
Made-to-order stainless steel sink unit for commercial kitchen washing and preparation areas.
View Details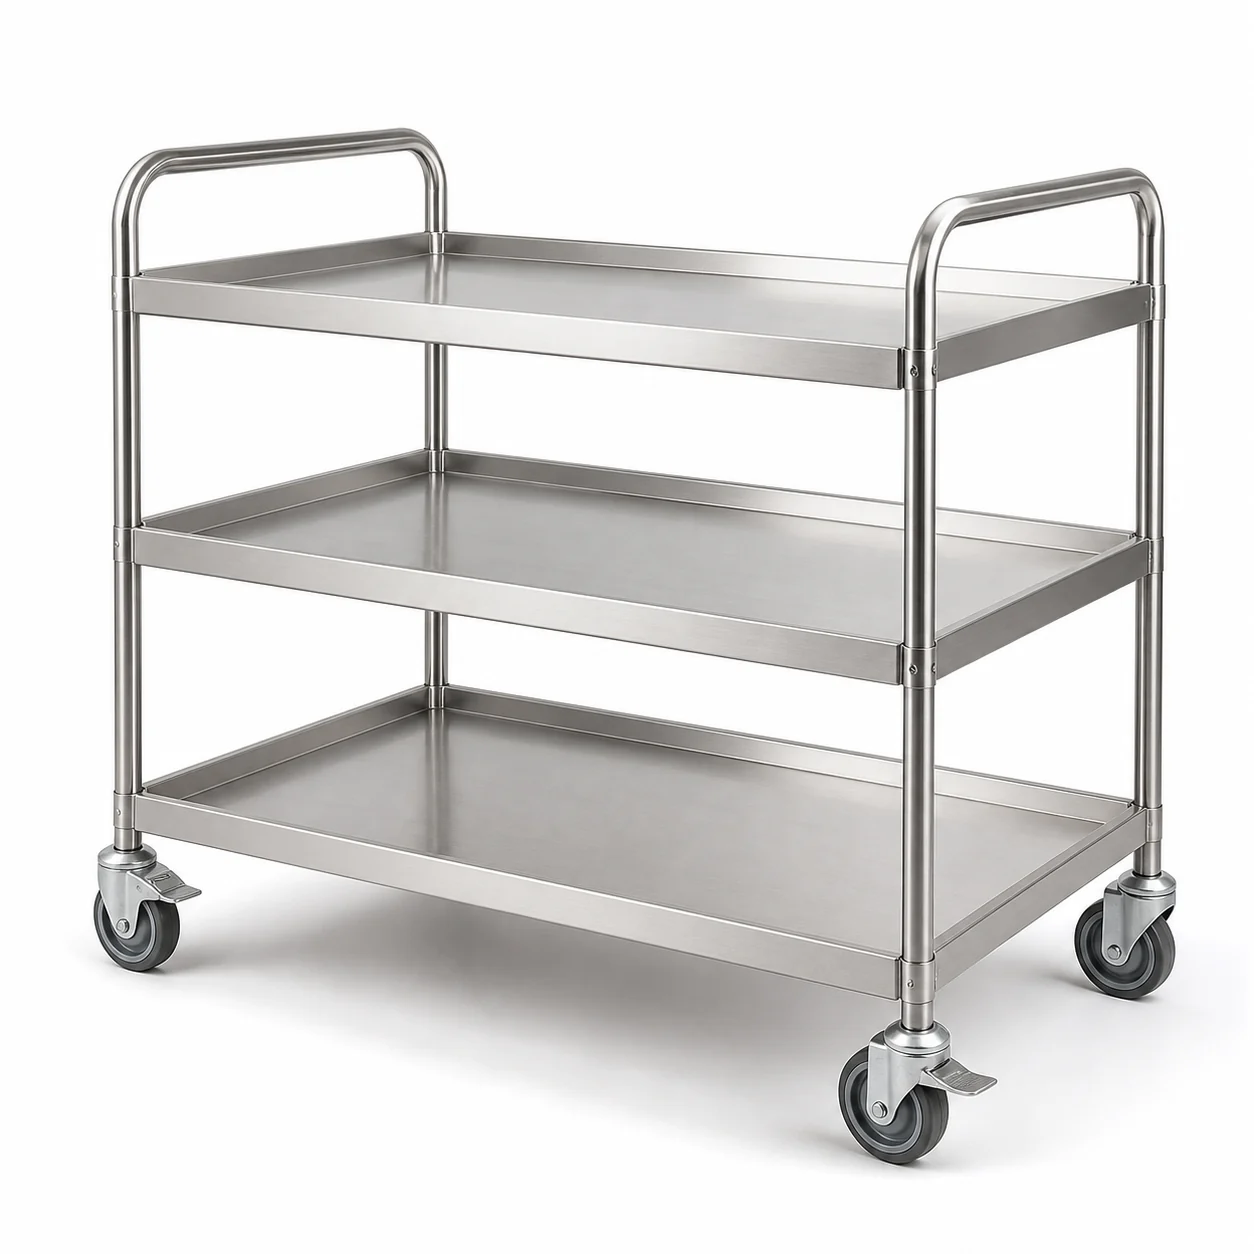
Stainless Steel Equipment
Stainless Steel Utility Trolley
Made-to-order stainless steel utility trolley for transport and organization in commercial kitchen workflows.
View DetailsRelated Solutions
Solution Pages Connected to This Article
Commercial Kitchen Solution
Restaurant Kitchen Solution
Equipment sourcing and configuration support for restaurants, cafes, and fast food kitchens.
Commercial Kitchen Solution
Hotel Kitchen Solution
Commercial kitchen equipment sourcing support for hotels, resorts, and banquet kitchen operations.
FAQ
Common Questions
What are the main zones in a commercial dishwashing area?
Common zones include dirty return, sorting and scraping, pre-rinse or wet preparation, inlet-side handling, the dishwasher position, clean-side exit, temporary clean storage and rack or trolley movement. The final arrangement depends on the machine, site conditions and project workflow.
Should dirty and clean dishes follow separate paths?
Where practical, dirty items should enter one side of the process and clean items should leave from the other side. The goal is to reduce unnecessary crossing and congestion. The exact arrangement depends on the available space and selected equipment.
Where should a dishwasher inlet table be installed?
An inlet table is normally planned on the machine loading side, between pre-rinse handling and the dishwasher. Its direction, height, interface and rack guidance should be checked against the selected machine rather than assumed to be universally compatible.
Does every commercial dishwashing area need a pre-rinse sink?
Not every project uses the same arrangement. Whether a pre-rinse sink is needed depends on the operation, item mix, selected machine and workflow. Any sink configuration should be confirmed against the project's wet-area requirements.
How should dishwasher direction be confirmed?
Confirm how racks or items will approach and leave the machine, then review whether the process operates left-to-right or right-to-left. The final direction should be coordinated with the machine, utility points, inlet-side equipment, clean-side handling and staff movement.
What information is needed before planning the dishwashing area?
Provide the operation type, peak period, item mix, selected or preferred machine, available room dimensions, machine direction, utility locations, access details, supporting equipment needs, site photographs and drawings where available.
Equipment Support
Need help selecting commercial kitchen equipment?
Share your kitchen type, product list, material or voltage requirements, destination country, and sourcing questions. SourcePro will review your inquiry and help organize suitable equipment directions.
Request a Quote